Need to pair garage door remote controls with your opener or update your security settings? Whether you are replacing a lost remote, upgrading your system, or trying to improve security, learning how to change code garage door opener settings is an important part of garage door ownership.
At ProLift Garage Doors of Spartanburg, we help customers every day with garage door remote setup, troubleshooting, and programming. Here is a step-by-step guide to help you get started.
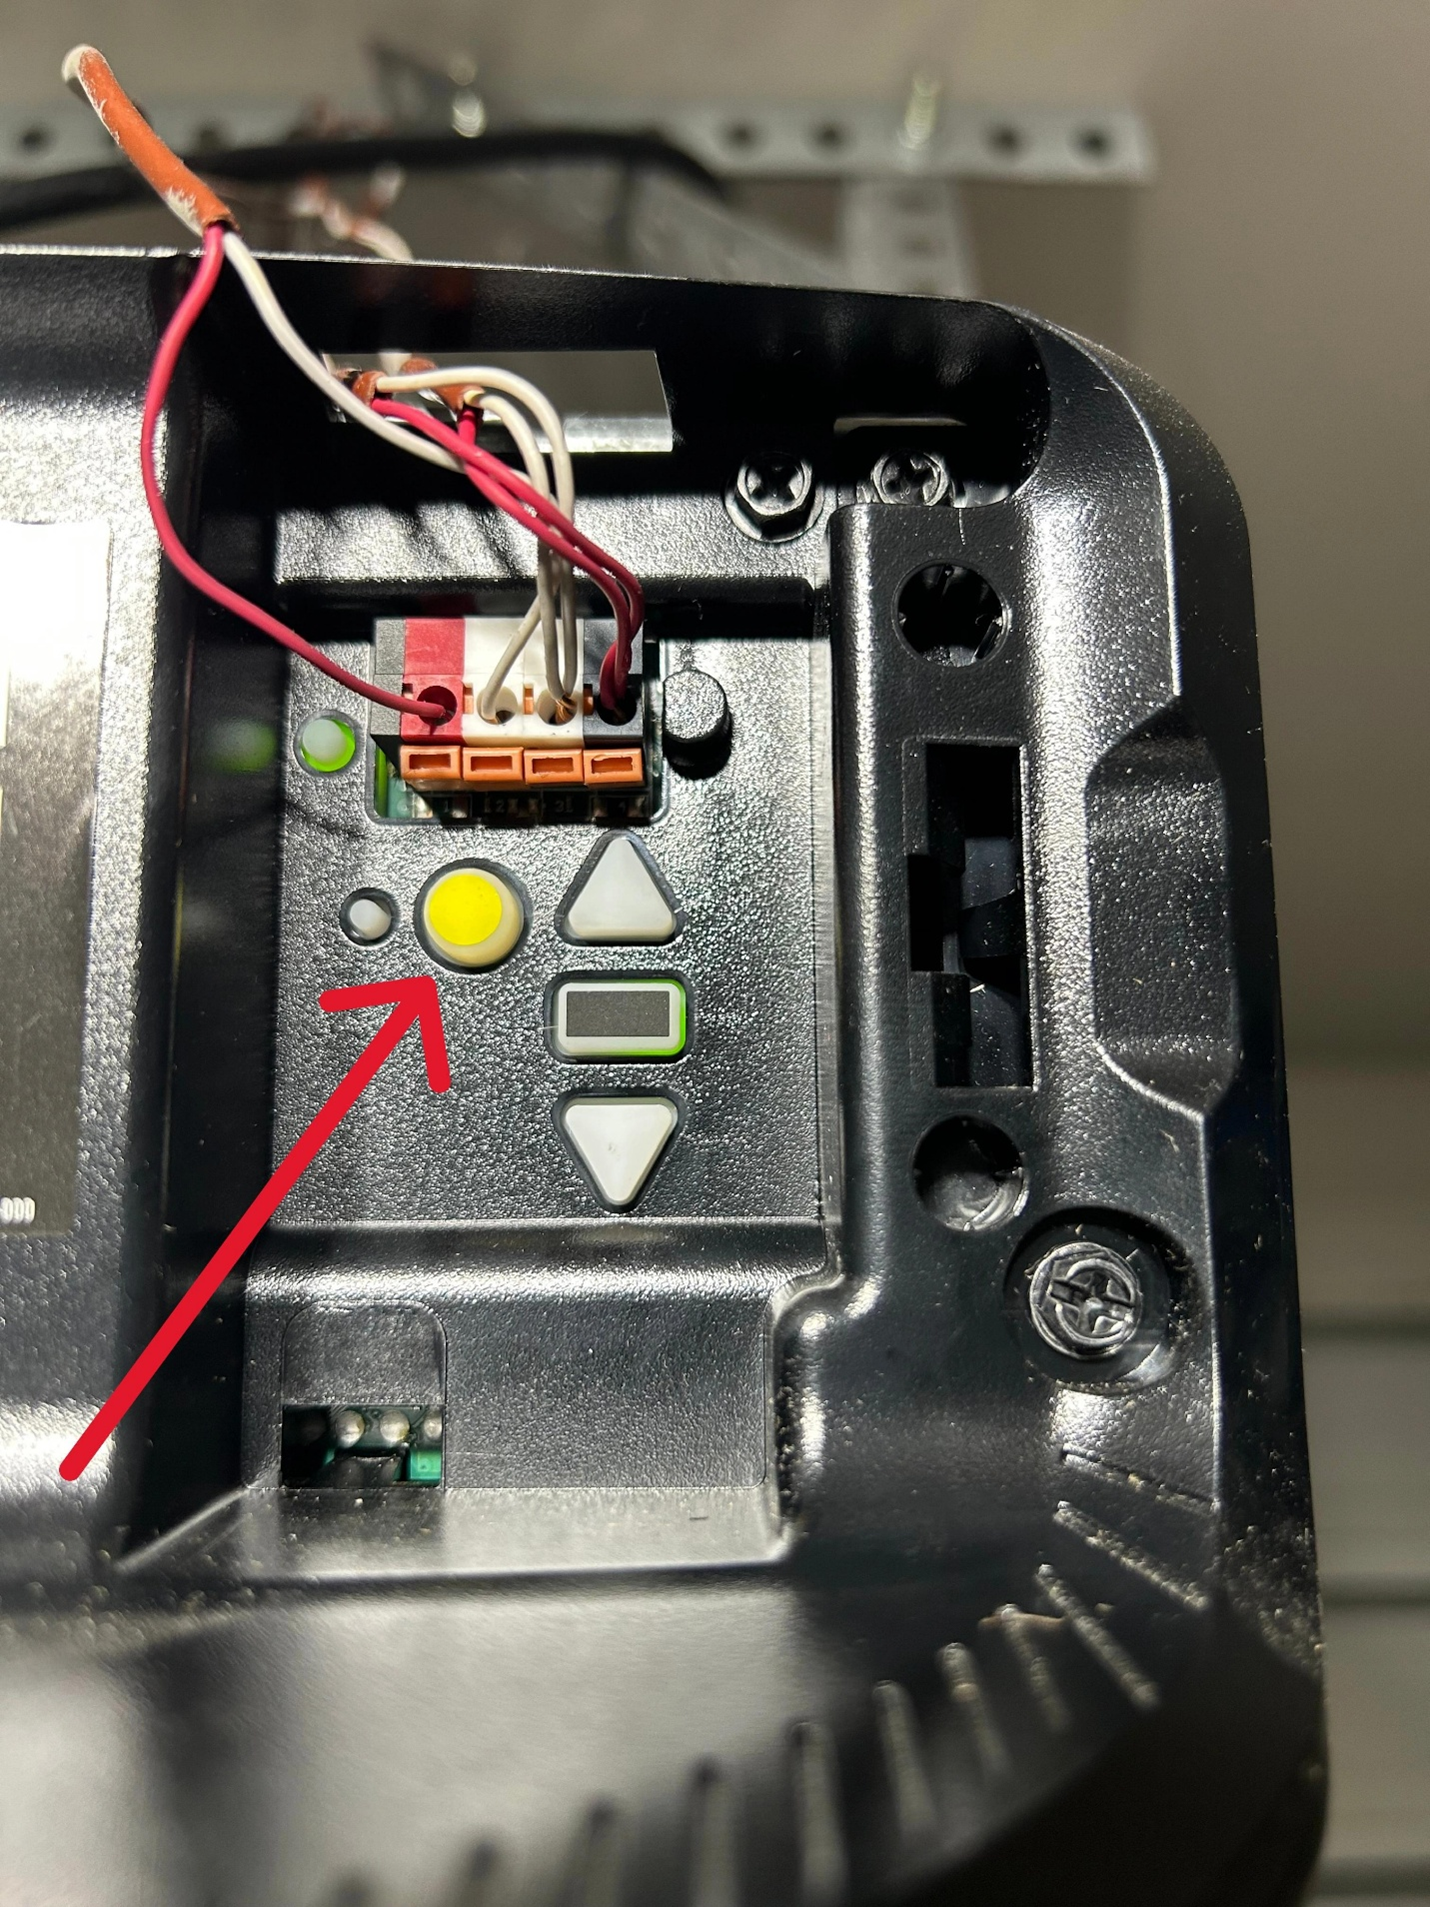
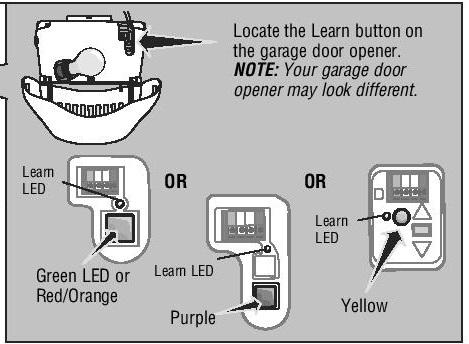
Step 1: Locate the Garage Door Opener Learn Button
Most modern openers have a garage door opener learn button located on the motor unit attached to the ceiling.
Common button colors include:
- Yellow
- Purple
- Red or orange
- Green
The button may be behind a light cover or access panel.
Your garage door opener manual can help identify the exact location and instructions for your model.
Step 2: Pair Garage Door Remote
To sync new garage door remote devices with your opener:
Steps to Pair Garage Door Remote
- Press and release the learn button
- A light will usually blink for 30 seconds
- Press the button on the remote you want to program
- Wait for the opener light to flash or click
Once complete, you have successfully completed the garage door remote setup process.
This process may vary slightly depending on the brand and model.
Step 3: Change the Code for Security
If you lost a remote or recently moved into a new home, it is smart to change code garage door opener settings.
A garage door security code change prevents old remotes from accessing your system.
How to Perform a Garage Door Opener Code Reset
Most systems allow you to:
- Hold the learn button for several seconds
- Clear all programmed remotes
- Reprogram only the remotes you want to keep
This process is often referred to as:
- garage door opener reset
- erase garage door remote codes
- garage door opener code reset
Step 4: Garage Door Wireless Keypad Setup
If you have an exterior keypad, you may also need a garage door wireless keypad setup.
Typical process:
- Press the learn button
- Enter a new PIN on the keypad
- Press enter or program
Your keypad should now communicate with the opener.
Step 5: Check Garage Door Remote Compatibility
Not all remotes work with every opener.
Before purchasing a replacement:
- Verify the brand and model
- Confirm frequency and compatibility
- Match the remote to the opener generation
Garage door remote compatibility issues are common when mixing older and newer equipment.
Step 6: Replace Remote Batteries
Sometimes the issue is simple.
Before attempting to reprogram garage door remote devices:
- Perform a garage door remote battery replacement
- Test the range and responsiveness
Weak batteries often mimic programming failures.
Step 7: Garage Door Remote Troubleshooting
If programming does not work, basic garage door remote troubleshooting may help.
Common Problems:
- Dead batteries
- Interference from LED lights or electronics
- Incorrect remote model
- Memory full on opener
- Faulty learn button
You may also need to:
- Link remote to garage door opener again
- Reset the opener entirely
- Verify the correct programming sequence
Can You Change Frequency on a Garage Door Opener?
Older systems sometimes allowed users to change frequency garage door opener settings with switches or dip switches.
Most modern systems now use rolling-code technology for better security and automatic frequency management.
When to Call a Professional
If you have tried programming and your remote still does not work, there may be:
- Circuit board issues
- Antenna problems
- Compatibility concerns
- Internal opener malfunctions
At ProLift Garage Doors of Spartanburg, we can quickly diagnose the issue and properly program or replace your remotes, keypad, or opener system.
Contact us today for professional garage door opener service and programming assistance.